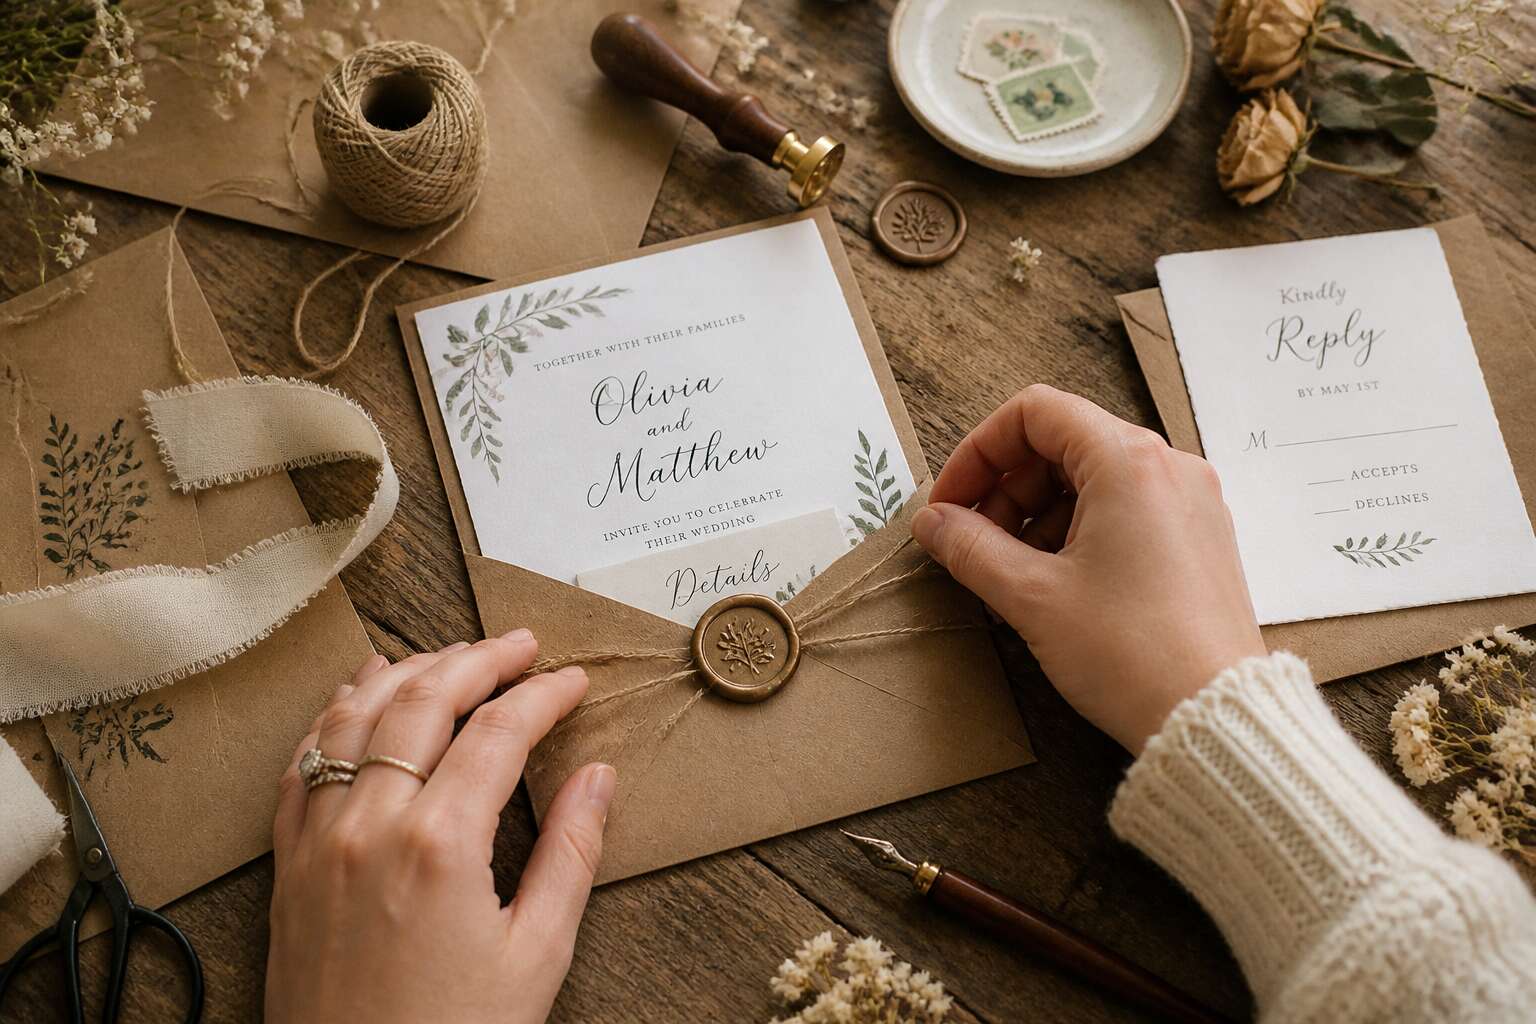
Essential Supplies and Tools for Making Your Own Wedding Invitations
Paper Types and Textures for Elegant Invitation Designs
The soft click of a bone folder along a scored line signals the start of something meaningful, which is why the wedding invitation diy appeals to detail driven couples. Your supply list should be honest but manageable.
- Self healing cutting mat
- Precision knife or rotary trimmer
- Acid free adhesive or double sided tape
- Embossing stylus for textured details
These items allow you to work cleanly without frustration.
Paper choices carry the visual narrative. Cotton rag paper offers a gentle tooth that catches light softly. Linen cardstock lends a woven, tactile rhythm. For bold statements, use a 350 gsm board with a deckled edge. The texture you select affects how ink settles, how envelopes feel, and how long your guests linger over the details.
Cutting Tools, Trimmers, and Scoring Boards for Perfect Folds
The average couple spends over 20 hours on wedding invitation diy projects. Cutting tools determine whether those hours feel deliberate or wasted. A rotary trimmer gives clean edges on thick cardstock, while a precision knife handles curves and fine details. For perfect folds, scoring boards are non negotiable. They create a shallow groove that prevents cracking on 300 gsm paper. Your essential kit should include:
- Rotary trimmer with a sharp blade
- Precision knife and spare blades
- Scoring board with multiple groove widths
- Metal ruler for straight cuts
A scoring board also helps with envelope inserts and pocket folds. Models with a swing arm offer accurate alignment. The right tools reduce waste and keep your process smooth.
Adhesives and Embellishments for Stunning Finishing Touches
Adhesives make or break the final assembly of your wedding invitation diy. A glue runner offers clean, dry application for flat layers, while a liquid adhesive with a fine tip handles delicate lace or vellum. For dimensional elements, foam tape lifts the design without messy residue. Embellishments add the last layer of meaning. Wax seals evoke old world correspondence, and silk ribbon ties give guests a tactile preview of your celebration. Consider these finishing touches:
- Wax seal kits with metal stamps
- Silk or satin ribbon in your palette
- Dried flowers pressed into vellum pockets
Each element should align with your theme and survive the postal journey. A well chosen adhesive ensures your wedding invitation diy looks intentional, not fragile.
Step-by-Step Methods for Printing and Assembling Invitation Suites
Choosing the Right Home Printer and Ink for Crisp Text and Graphics
Every couple embarking on a wedding invitation diy journey quickly discovers that the printer is the true heart of the operation. A home printer with a piezoelectric printhead, such as those found in many Epson models, delivers superior control over pigment particles, which is essential for crisp, dark serif fonts that feel like pressed letterforms. Thermal inkjet printers, while common, often struggle with bleed on thick cotton papers, so test a full page before committing to a final run. Consider the print driver settings; choosing a high quality mode and selecting photo paper over plain paper can dramatically alter the saturation and sharpness of your graphics, even on standard stationery. For merlot-bottle-toned palettes, ensure your cartridge contains enough pigment to lay down an even coating without banding, which shows up as faint horizontal streaks across the wedding invitation diy suite.
The assembly itself calls for a specific sequence to avoid smudging warm, freshly printed ink. Lay each printed sheet face up on a drying rack for at least thirty minutes, depending on your ambient humidity in Johannesburg or Cape Town. Then, follow a logical assembly flow with your prepared pieces. A standard suite often stacks as follows:
- Place the response card in front of the reception details card.
- Slide both into the smallest envelope, tucking the flap inward.
- Position the main invitation atop the inner envelope, centered.
- Wrap the stack in the outer envelope, careful not to press the embellishments.
Pressing a scoring board indentation before this step creates a clean fold for the inner envelope, but the assembled stack must still have some give. If you are printing on both sides, wait a full hour for the ink to cure before flipping the sheets. This patience preserves the tactile detail you worked for during cutting and prepping. The satisfaction comes when you hold a finished, layered suite that feels weighty in the hand. That is the precise moment your wedding invitation diy effort transforms from a craft project into a tangible, beautiful first impression for your guests, matching the elegance of the paper types you already selected.
How to Format and Align Your Designs for Double-Sided Printing
Double-sided printing is where many a wedding invitation diy campaign goes to die, usually in a spectacular heap of ink-smeared regret. The core problem is alignment. Your home printer is a marvel of controlled chaos, and it has no idea where you imagine the fold line to be. You must assert dominance over its margins.
To do this, create a test file with a crosshair mark at the exact centre of each page. Print this on both sides of a blank sheet. Hold it up to the light and see how far your printer’s second pass drifted. Adjust the coordinates in your design software, not by guessing, but by measuring the error in millimetres. It is a humbling exercise.
– Set your bleed to 3mm, not the default of zero.
– Work in CMYK to preview true ink saturation.
– Flip on the long edge for cards that read like a book.
– Flip on the short edge for top-to-bottom reverses.
– Use the same sheet orientation for both sides.
Once the crosshairs line up, you are ready for the real paper. Remember that the reverse side will have a slightly different texture feel under your fingers. Do not panic when the ink appears less vibrant on the second pass. That is simply the cotton fibres drinking the pigment at a different angle. The reward for this fiddly patience is a suite that feels professionally manufactured, and you will never admit to the hours spent staring at test sheets under a desk lamp. Your wedding invitation diy project just gained a serious layer of technical credibility.
Assembling Layers, Liners, and Wraps Like a Professional
Assembly starts with a single scored fold. You have your printed sheets, your liners, your wraps, the raw materials of your wedding invitation diy. The trick is to build from the inside out. Insert the liner first, tucking it neatly against the fold, then wrap the outer layer around the whole suite. Press each seam with a bone folder, but not too hard. You want a crisp edge, not a dent. Here is the order I use:
- Lay the wrap face down on a clean mat.
- Centre the inner card stack on top.
- Fold the left flap over, then the right, and pause.
Check the liner pattern orientation before you commit to adhesive. A misaligned liner will mock you from every envelope. Use a scoring board to create a living hinge on the wrap. This allows the suite to open flat instead of springing closed. The final stack should sit flush, no edges peeking out. That is the quiet sign of a wedding invitation diy done properly.
Sealing Envelopes with Wax Stamps and Custom Closures
The average couple spends over 400 hours planning their wedding, yet the invitation suite is often the last thing they finalize. That is a mistake. The final phases of your wedding invitation diy are where intention becomes visible. Printing demands a settled hand and a clean nozzle. Run a test sheet on plain paper first, not just for alignment but for ink saturation. Heavy cardstock absorbs pigment differently, and your home printer’s profiles rarely account for that variance.
Once the sheets are dry, assembly becomes a ritual of patience. Work in batches of ten to maintain consistency. Lay the printed inner card onto the wrap, then fold the flaps with a bone folder for a sharp crease. The order matters: innermost piece first, then the liner, then the wrap. Use this sequence for each suite:
1. Score the wrap on your board.
2. Center the card stack on the wrap.
3. Fold the left flap, then the right.
4. Press all seams firmly.
This rhythm prevents smudging and keeps the stack flush. A misaligned liner will mock you from every envelope, so check the pattern orientation before adhesive touches anything.
Sealing envelopes with wax stamps and custom closures adds a tactile gravity that digital invites cannot replicate. Melt the wax slowly over a low flame, stirring with the spoon handle. Pour a generous pool, then press the stamp with a steady, even motion. Hold for six seconds. Do not twist, that smears the impression. For custom closures, a thin ribbon wrapped twice and tied in a flat knot keeps the envelope secure without bulging. The weight of the wax adds a sensory promise: this is a physical object made by your hands. Your wedding invitation diy ends here, with a sealed envelope that feels heavier than paper.
Creative Design Ideas to Personalize Your Homemade Wedding Invitations
Watercolor Washes and Hand-Painted Accents for a Romantic Look
The trend of handmade wedding invitations has surged, with many couples seeking a personal touch that digital designs cannot replicate. One of the most enchanting paths involves watercolor washes, where you can create ethereal gradients that mimic the softness of a Cape Town sunset. You can achieve this by applying a wet-in-wet technique to thick cotton paper, allowing pigments to bloom organically. This method is forgiving, even for beginners, and produces a unique, one-of-a-kind backdrop for your calligraphy.
Beyond the wash, consider adding hand-painted accents to bring focal points to life. For a truly bespoke feel, experiment with these simple methods:
- Painting a sprig of fynbos to echo your venue’s garden.
- Adding a delicate gold-leaf edge to mimic traditional Cape Dutch architecture.
- Creating a subtle, painted shadow behind a monogram.
These details transform the printed card into a keepsake that speaks to your specific journey. The tactile nature of the artwork, with its slight imperfections, is where the romance lies. When combined with a thoughtful typography choice, your wedding invitation diy project becomes an immersive experience, offering your guests a tangible prelude to the celebration ahead.
Incorporating Botanical Elements and Pressed Flowers
Pressed flowers carry the memory of a day long before the ink dries. The fynbos of the Western Cape, with its delicate Erica and the robust Protea, offers a palette that commercial printers simply cannot capture. For a wedding invitation diy, this requires a gentle hand, as the final card becomes a fragile herbarium.
Consider the art of botanical illustration. You can reproduce the fine, linear structure of a leaf or the radial symmetry of a wildflower using pen and ink, which provides a stark contrast to the softer washes we spoke of earlier. If you prefer dimension, your wedding invitation diy benefits from pressing blooms between the pages of a heavy book for a fortnight, then affixing them with a dot of pH-neutral adhesive. The resulting texture is a relic.
– Use a sprig of lavender to scent the envelope, a subtle olfactory prelude.
– Press a single Borage flower, its blue hue is striking against ivory cotton.
– Trace the skeletonised form of a leaf with copper pigment for a metallic sheen.
The placement of these elements is a curation, a study in negative space. Resist the urge to scatter; instead, place a single specimen near the clasp or beneath the monogram. A botanical motif is a silent nod to the local landscape, a tangible proof of place. For a layered effect, you might create a custom liner.
1. Place the pressed fern in the centre of the liner paper.
2. Lay a sheet of translucent vellum over the arrangement.
3. Secure the vellum to the back of the card with a fine runner of glue.
This technique, while requiring patience, yields a shadowbox effect that feels dimensional and alive. It is a process that invites you to slow down, to consider the weight of each petal, and to infuse your wedding invitation diy with an organic narrative. The charm comes from the imperfection; a tiny stem that curls unexpectedly or a petal that has changed colour, these are features of beauty, not flaws.
Modern Minimalist Layouts Using Typography and Negative Space
Restraint is the most difficult skill to master. In a wedding invitation diy, the empty space on the card carries as much weight as the letters you print. A modern minimalist layout depends on your willingness to leave that space untouched.
Typography becomes the sole visual voice. Choose a single typeface family and vary the weight. A light sans-serif for the names, a bold condensed style for the date. Set the text on a strict grid, align left, ragged right. The negative space between lines, the leading, the margins, the gap between the monogram and the reception details, all of it controls the pace.
Scale offers another lever. Set the location name at a point size three times larger than the rest. Let it occupy the corner of the card without competing elements. For a wedding invitation diy that feels expensive without added cost, invest your effort in kerning and line spacing instead of embellishments. The result reads as intentional, almost architectural.
Using Calligraphy and Hand Lettering Techniques Without Professional Tools
A handwritten envelope still stops people mid-motion. You do not need a dip pen or a R3,000 calligraphy set to achieve that effect. Faux calligraphy uses any pen you already own. Write the word in cursive, then thicken the downstrokes with a second pass.
Brush pens offer a faster route. A medium tip Pentel or Tombow gives you line variation naturally. Practice on scrap paper first. Lettering is muscle memory, not magic. In any wedding invitation diy, this is the skill that impresses guests the most.
For a wedding invitation diy, you can letter the couple’s names on the outer envelope and use a clean printed insert for the details.
- Letter the return address on the back flap
- Add a hand-lettered monogram above the reception line
- Write the RSVP date in a contrasting colour
Each touch takes minutes but shifts the whole piece from printed to personal.
Themed Invitation Suites for Rustic, Beach, and Garden Weddings
A wedding invitation diy reaches its full potential when the theme pulls every piece together. Rather than mixing random papers and fonts, choose a narrative that mirrors the ceremony’s setting. Rustic weddings suit kraft cardstock, burlap wraps, and twine ties. Beach weddings benefit from translucent vellum overlays, subtle wave motifs, and sand colored ink. Garden weddings embrace soft watercolor washes, leafy edges, and delicate serif typefaces. The time you invest in matching these elements transforms the suite into a deliberate experience.
Consider these details for each theme:
- Rustic: wood veneer accents, linen textures, and neutral palettes
- Beach: seashell embossing, aqua gradients, and lightweight papers
- Garden: pressed flower inserts, muted greens, and organic shapes
When the outer envelope, response card, and ceremony insert share these visual cues, the wedding invitation diy feels curated, not assembled. Guests notice the cohesion before they even open the flap. That moment of recognition justifies every careful choice you made during production.
Budget-Friendly Strategies and Common Pitfalls to Avoid in Invitation Crafting
How to Estimate Your Paper and Supply Costs in Advance
The most expensive wedding invitation diy project I witnessed never reached the mailbox. The couple spent double their budget on supplies they could not use. Do not repeat that mistake. Estimate paper and supply costs before any purchase. List every component: cardstock, envelopes, liners, adhesives, and ink. Price each at your local stationery store and online, because South African retailers differ widely. Calculate per invitation, multiply by your guest count, then add twenty percent for failed prints and miscuts.
Common pitfalls appear in predictable forms:
- Buying materials before finalizing the design creates mismatched envelopes and wasted cardstock.
- Underestimating ink consumption drains funds quickly; one test run can empty a cartridge.
- Ordering from multiple suppliers multiplies shipping fees, and replacement envelopes rarely match the original shade.
Your wedding invitation diy budget holds when estimation happens first.
Free and Low-Cost Design Templates for DIY Invitation Projects
The average South African couple throws away nearly a third of their wedding invitation diy supplies. This waste is not from poor planning. It is from overbuying on trending decorations and underestimating the free tools at their disposal.
A free design template from Canva or a similar platform should be your first stop. It saves you hundreds of rands in graphic design fees and provides a solid base for formatting. Use these tools to map out a cohesive suite before you spend a cent.
– Free templates often have layouts that do not match local envelope sizes. Always measure your envelope before printing.
– Many templates use standard fonts. Swap these for free calligraphy styles to elevate the design.
– Do not pay for premium elements. Google Fonts and open-source graphics offer plenty of options.
Spending on new paper is a common trap. Check your home printer for unused cardstock or stash of recycled paper first. This approach keeps your wedding invitation diy affordable without sacrificing a premium feel. A mismatched inner liner is a minor issue. An expensive one that needs to be trashed is not. Stay cheap, stay smart, and avoid the R45 hook and loop dot that seemed like a good idea at 11pm.
Time-Saving Production Tips for Large Guest Lists
The real cost of a wedding invitation diy project often hides in the hours spent redoing fiddly steps. Enthusiasm drains faster than expensive ink when you are assembling fifty suites with shaky hands and a blunt bone folder. Your budget will survive if you treat the production line like a small factory.
Time disappears when you overcomplicate the design. A laser cut gatefold might look majestic, but it demands patience you do not have before the venue calls about chair covers. Keep the mechanics simple and pour your energy into one striking detail, like a velvet belly band or a wax seal. This creates a premium feel without the assembly nightmare.
For a large guest list, adopt a ruthless approach to sequence. Print everything in one session, then move to cutting, then folding, then gluing. Do not bounce between tasks. Here is the order that saves your sanity:
1. Print and trim all outer cards first.
2. Fold every single piece before you touch the adhesive.
3. Assemble the layers stack by stack, not guest by guest.
4. Stuff and seal envelopes only after every suite is complete.
This method halves the time you spend switching mental gears. A mismatched inner liner is a minor issue. An expensive one that needs to be trashed is not. Stay cheap, stay smart, and avoid the R45 hook and loop dot that seemed like a good idea at 11pm. Your wedding invitation diy should feel controlled, not chaotic. Plan for the grind, and the romance of the finished product will still shine through the exhaustion. Consider printing your RSVP cards on postcard stock to skip the envelope stuffing entirely. That single move trims an hour of monotonous labour from your production day. The best budget strategy is the one that gets the invites out the door before you lose your will to live.
Avoiding Common DIY Invitation Mistakes with Proofing and Testing
Proofing is the most affordable safeguard in any wedding invitation diy project. A single reprint run of fifty suites can cost more than R200 in ink and cardstock. Print one complete suite before committing to bulk production. That test sheet catches font glitches, alignment drift, and ink bleeding that remain invisible on screen. Errors multiply across copies. One typo on the RSVP deadline means time and cardstock wasted.
Budget-friendly crafting also depends on testing the assembly sequence. Fold a dummy invite with the exact paper weight you plan to buy. Some affordable cards crack along the score line. Others reject adhesive. A five minute test prevents an entire afternoon of wasted supplies.
Common pitfalls cluster around rushed decisions:
– Skip the proof print entirely
– Buy envelopes before measuring the finished suite
– Assume every home printer handles 300gsm stock
Each mistake adds hidden costs. Careful proofing keeps your wedding invitation diy budget from quietly disappearing on reprints and replacements.
Eco-Friendly Alternatives Using Recycled and Seed Paper
Eco-friendly materials are no longer a niche choice. They are a practical response to the waste that weddings generate. Recycled cotton paper offers a textured, tactile surface that photographs beautifully. Seed paper, embedded with wildflower seeds, transforms the invitation into a living keepsake. Guests plant the RSVP card and watch it bloom, a small act of renewal that extends the wedding narrative.
Using these materials does require a shift in mindset. The printing surface is less forgiving than standard cardstock. Ink can bleed more readily if the paper is too porous. A proof print becomes essential, not just for typography but for testing how the fibres absorb color. This testing also applies to the assembly. Seed paper is thick and brittle. It may not hold a crisp fold. Consider this when planning the envelope size.
Pitfalls appear quickly for the unprepared. Common budget traps include:
1. Buying recycled paper without checking the grammage. A flimsy sheet feels cheap.
2. Forgetting that seed paper needs a flat envelope insert. It cannot be folded.
3. Assuming all home printers can handle textured stock without paper jams.
Each of these issues adds rework. The solution is to let the material dictate the process. Visit a local supplier in Johannesburg or Cape Town to feel the paper before you commit. The colour variations in recycled stock mean batch consistency is a gamble. Order all your paper at once. This approach keeps the wedding invitation diy project grounded in reality, avoiding unintended costs and preserving the budget for the reception.
What to Do When Your Home Setup Isn’t Perfect: Backup Plans
Your home setup will betray you at the worst moment. The printer jams, the ink cartridge runs dry, or the scoring board slips. For a wedding invitation diy project, these failures are not disasters, they are expectations.
A backup plan costs little and saves hours. Keep a spare ink cartridge on hand. Test the final design on plain paper before committing to the good stock. If your printer refuses to cooperate, visit a local print shop in Johannesburg or Pretoria. They can run your invitations for a modest fee while you handle the assembly at home.
Budget pitfalls hide in material choices:
– Cheap glue warps your paper.
– Poor quality envelopes tear during sealing.
– Overbuying embellishments leaves you with unused stock.
Planning for failure keeps the wedding invitation diy process affordable and calm.

0 Comments